Using letsencrypt certificates with a Taskwarrior server
Sun 23 July 2017 in Administration. Tags: taskwarrior, letsencrypt. By mrwonko.
Back in May a colleague recommended Taskwarrior to me for task management. And while tools don't matter nearly as much as the way you use them (i.e. your psychology), I think Taskwarrior encourages a bunch of useful habits like regularly reviewing outstanding tasks, grouping them into projects and tagging them for easy filtering.
To get the most out of task management software you need to be able to quickly take a note anywhere, and that means having it on all your devices and syncing the tasks between them. This requires setting up your own Taskserver, which I actually prefer to cloud services because I maintain control of my data and know the service won't be shutdown unexpectedly.
There's a pretty good guide on setting up a Taskserver, but it involves self-signing certificates for your server. I have a proper letsencrypt certificate, so naturally I wanted to use that instead. It took me some tinkering, but I managed to make it work.
Taskwarrior uses TLS x509 Authentication to verify it's talking to the correct host. That essentially means there's a public/private key pair used for encryption and a certificate signed by a trusted authority verifying that this is the correct server for the domain. This mechanism is used to verify both the server's and the client's identity.
Here's an explanation of the server settings:
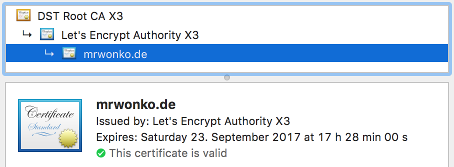
server.key: private key used by server for authentication and encryption. I set this to my letsencryptprivkey.pem.server.cert: chain of certificates used to validate server signature. This file can actually contain multiple certificates, the first one for the server itself, where each one verifies the one before it, all the way up to some root certificate trusted by the client. I set this to my letsencryptfullchain.pem, which contains both my server's certificate and the Let's Encrypt X3 certificate signing it, which in turn is trusted by the DST Root CA the client should be trusting.

server.crl: Certificate Revocation List. This could presumably be used to reject compromised clients. I left it empty, as I don't currently need it.-
client.key/client.cert: here's what the guide says about these:These are for API access, and not for your Taskwarrior client.
So I think they're safe to ignore.
-
ca.cert: these are the root Certificate Authorities accepted by the server. They are used to verify the identity of the clients. Apparently the file can contain multiple root certificates, but I only use one: The self-signed one whose generation is described in the guide, created usingpki/generate.ca.
And these are the relevant client settings:
taskd.key: private key used by client for authentication and encryption. I used thefirst_last.key.pemgenerated as per the guide usingpki/generate.client first_last.taskd.certificate: certificate (chain) signing the private key with a certificate in the server'sca.cert. Again, I used thefirst_last.cert.pemgenerated usingpki.generate.ca, which is signed using the self-signed root certificate.taskd.ca: root certificates trusted by the client. This is where the magic happens. As seen above the root certificate for letsencrypt is the IdenTrust DST Root CA X3, this one. So that's what I use here:
-----BEGIN CERTIFICATE-----
MIIDSjCCAjKgAwIBAgIQRK+wgNajJ7qJMDmGLvhAazANBgkqhkiG9w0BAQUFADA/
MSQwIgYDVQQKExtEaWdpdGFsIFNpZ25hdHVyZSBUcnVzdCBDby4xFzAVBgNVBAMT
DkRTVCBSb290IENBIFgzMB4XDTAwMDkzMDIxMTIxOVoXDTIxMDkzMDE0MDExNVow
PzEkMCIGA1UEChMbRGlnaXRhbCBTaWduYXR1cmUgVHJ1c3QgQ28uMRcwFQYDVQQD
Ew5EU1QgUm9vdCBDQSBYMzCCASIwDQYJKoZIhvcNAQEBBQADggEPADCCAQoCggEB
AN+v6ZdQCINXtMxiZfaQguzH0yxrMMpb7NnDfcdAwRgUi+DoM3ZJKuM/IUmTrE4O
rz5Iy2Xu/NMhD2XSKtkyj4zl93ewEnu1lcCJo6m67XMuegwGMoOifooUMM0RoOEq
OLl5CjH9UL2AZd+3UWODyOKIYepLYYHsUmu5ouJLGiifSKOeDNoJjj4XLh7dIN9b
xiqKqy69cK3FCxolkHRyxXtqqzTWMIn/5WgTe1QLyNau7Fqckh49ZLOMxt+/yUFw
7BZy1SbsOFU5Q9D8/RhcQPGX69Wam40dutolucbY38EVAjqr2m7xPi71XAicPNaD
aeQQmxkqtilX4+U9m5/wAl0CAwEAAaNCMEAwDwYDVR0TAQH/BAUwAwEB/zAOBgNV
HQ8BAf8EBAMCAQYwHQYDVR0OBBYEFMSnsaR7LHH62+FLkHX/xBVghYkQMA0GCSqG
SIb3DQEBBQUAA4IBAQCjGiybFwBcqR7uKGY3Or+Dxz9LwwmglSBd49lZRNI+DT69
ikugdB/OEIKcdBodfpga3csTS7MgROSR6cz8faXbauX+5v3gTt23ADq1cEmv8uXr
AvHRAosZy5Q6XkjEGB5YGV8eAlrwDPGxrancWYaLbumR9YbK+rlmM6pZW87ipxZz
R8srzJmwN0jP41ZL9c8PDHIyh8bwRLtTcm1D9SZImlJnt1ir/md2cXjbDaJWFBM5
JDGFoqgCWjBH4d1QB7wCCZAA62RjYJsWvIjJEubSfZGL+T0yjWW06XyxV3bqxbYo
Ob8VZRzI9neWagqNdwvYkQsEjgfbKbYK7p2CNTUQ
-----END CERTIFICATE-----
And that's all that's necessary to securely encrypt and authenticate communication between Taskwarrior and a Taskserver. Hooray!
So in the end nothing really special was necessary, it was primarily a matter of understanding what exactly all the settings do and that most places that say "cert" or "ca" (singular) actually accept files containing lists/chains, which mostly involved diving through the taskd source code and the gnutls documentation.
Next step: writing a Windows Phone client!
Addendum:
Remember to restart your taskd server when your certificate changes, or sync will fail once it expires!
Comments
No comments.